Foreword
This guide assumes a happy path through embossing and engraving. That is, no perspective, skewing, folds, or other special cases are present. Everything is flat, well-lit, oriented correctly, with nothing obscuring the monogramming area. SKUs with those issues present will likely require some experimentation and time to learn how to use the tool to create a realistic texture mesh properly.
The bulk of the products found in the Fossil catalog with available monogramming are straightforward. The monogramming area can be defined with simple circles, squares, or rectangles. Others may require a more precise selection of pixels.
Preparing the Photoshop File
Begin by downloading the files provided to you on the Workfront ticket. Depending on your access, these may come from Google Drive or the Digital Asset Management (DAM) system.
Open the files in Photoshop.
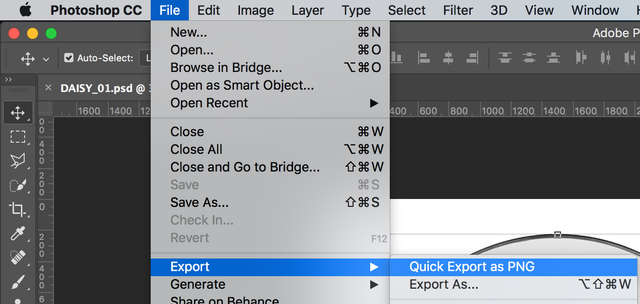
At this point, I like to save time by exporting the files as PNGs. You will need these later in the Scene7 Vignette Authoring Tool (VAT) to create the vignette file. To do this, click on File → Export → Quick Export as PNG.
Save the file where you will be able to easily find it.
Next, we need to create masks for Scene7 to use to create the monogram as well as isolating the background.
You’ll notice that the file already has several layers already prepared for you:
productshadowgraywhite
Right-click (or control-click) on the product layer and choose Select Pixels.
Next, flip over to the Channels tab and click Save Selection as Mask. The button looks like this:

Name that new mask: bg
Now, you need to select the area for the monogram. As I said in the foreword, in most cases, Fossil’s monogramming products fit nicely into simple shapes such as squares, circles, and rectangles. Keep it simple. No need to invert this selection, you want this area masked off.
Go back to your Channels tab and save the new selection as a mask named: FLOW/MNGRM
Your Channels tab should now look like this:

And that’s it for Photoshop.
Save your file.
It’s time to move to the Scene7 Vignette Authoring Tool (VAT).
The naming scheme is critical and case sensitive. The mask
bgmust be lower case andFLOW/MNGRMmust be all uppercase and include the slash. These names are how Scene7 will assemble the monogramming render once uploaded to the server.
Preparing the Scene7 Vignette File
The Scene7 desktop application is a legacy application from Adobe for the preparation of files for the Scene7 Publishing System. It allows for the dynamic creation and manipulation of images by web services. It can change the colors of clothing, furniture, etc. It can alter patterns. Simulate embroidery, monogramming, and other personalizations.
At Fossil, we primarily use Scene7 for our monogramming and for the customizable watch experience.
I usually prefer to work with the files I created for the Photoshop step open in the file explorer. Then I copy the file name of the first item.
Importing Photoshop
If you don’t have it open already, open Vignette Authoring Tool (VAT).

This is your toolbar in VAT. From left to right:
OpenSaveUndoRedo3D ModelObjectsMasksIlluminationReflectionsFlowlinesSketchRenderActive ViewSelected ObjectPropertiesZoom InZoom OutFit WindowSplit WindowHelpSave All & ExitEdit Image in Photoshop
The items in bold are the ones I mainly find myself using in normal day-to-day work in Scene7.
You’re going to need to create a new file. Either press Ctrl+N or navigate to File → New.
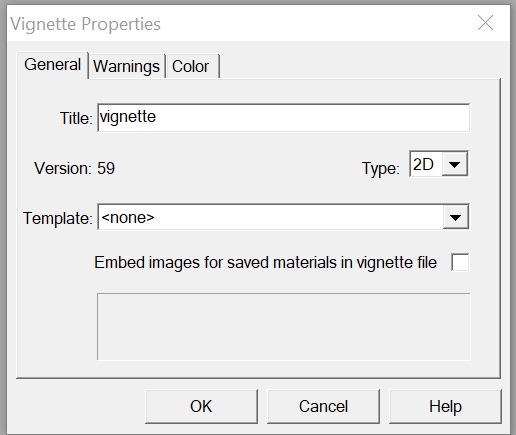
The only piece of information we worry about on this screen is the Title. Title is the name of the file. Paste in the file name you copied from the file explorer and then hit OK.

In the next screen, press Action... It will bring up the file dialog. Select the PNG file you exported in the previous Photoshop step and then hit OK.
You’ll be taken to a screen that looks fairly similar to older versions of Photoshop. From here, we need to build out the layer structure that Scene7 will use to create the rendered monogram.
Begin by right-clicking on the layer list on the right and selecting “New Group.” Name that new group FLOW.
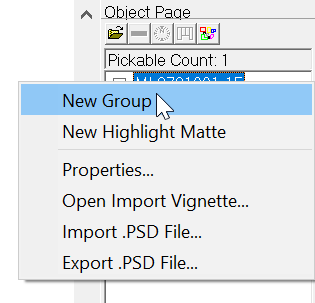
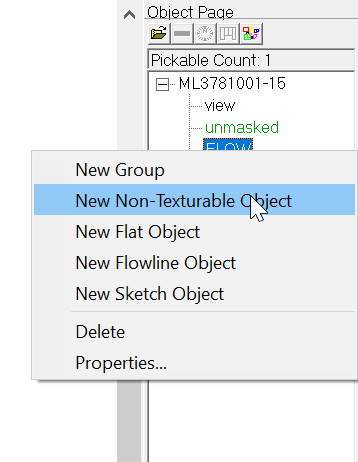
Right-click on FLOW and select “New Non-texturable Object” and name it bg.
Drag bg out of the FLOW group, so it sits at the bottom of the list.
Right-click on FLOW again and this time select “New Flowline Object” name it MNGRM.
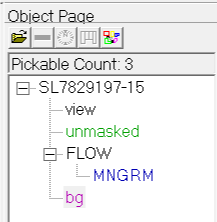
Your layers should now look like this:
Save the file.
Now click on File → Import Masks etc... to import the PSD file into the vignette file.
Once again paste in the copied name in and press enter. If you laid the file out correctly, the layers will be imported in.
Verifying Import
To verify my layers were imported correctly, I like to click on the mask icon ![]() and make sure the dropdown is set to
and make sure the dropdown is set to MNGRM. If everything imported correctly, the mask you created in the Photoshop step should be colored. (Blue by default, but you can change this in your settings.)
Adjusting Illumination
Next, click on the lightbulb ![]() and make sure the dropdown is still set to
and make sure the dropdown is still set to MNGRM.
Your toolbar on the right will change to this:
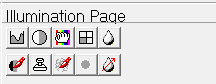
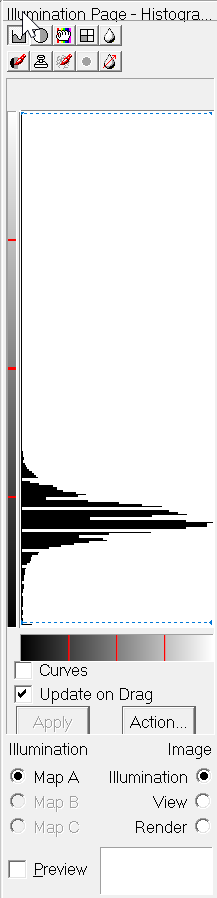
For our purposes, we’re only concerned with the top two buttons on the left. The one on the left ![]() is the Histogram tool; the one on the right
is the Histogram tool; the one on the right ![]() is the Brightness/Contrast tool. For the embossing or engraving to work, you’re going to need to adjust the one or both of these to make it visible.
is the Brightness/Contrast tool. For the embossing or engraving to work, you’re going to need to adjust the one or both of these to make it visible.
To adjust the histogram, press shift and drag section you need to adjust.
This is an older application, so you’re going to need to hit Apply to actually have the program apply any of your changes or adjustments.
Illumination Tips
For simple engraving such as watches, you can usually use the “Preserve Contrast” preset under “Action…” for perfect results.
For dark leathers, you may need to adjust the histogram until the preview turns stark white for the emboss to be visible.
Adding Flowlines
Now that we’ve adjusted the illumination map, now we need to add the Flowlines that will control the monogram.
Click on the Flowlines icon ![]() .
.
The panel on the right will change to present the Flowline tools. Click on the Texture Tool icon ![]() in the middle.
in the middle.
The panel will change once again to look like this:
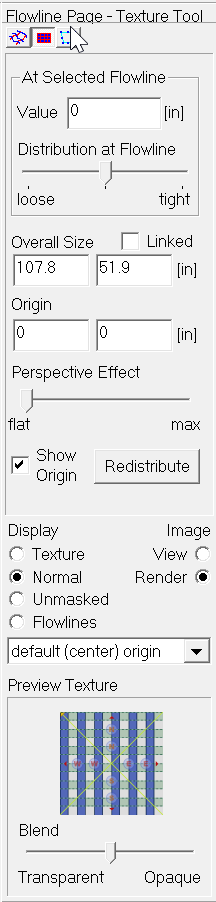
For most of Fossil’s embossing/engraving projects, you’ll only need to worry about the size and the position of the texture.
Some things to know:
- The smaller the number, the bigger the texture.
- There are tiny dashed lines indicating the vertical and horizontal centers.
- Decimal places are accepted.
- The directional letters on the plaid preview texture I use are roughly the size of the finished monogram.
- The texture does not stay in proportional unless you check the
Linkedcheckbox.
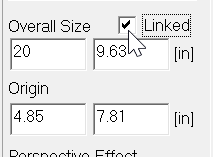
You need to set the size of the texture until it’s roughly the size you need. Unfortunately, this is a lot of trial and error until you find a sweet spot. I find most work I do falls somewhere in the 20 – 30″ range.
Next, there’s a vertical purple dashed line and a horizontal green dashed line that will show you the center of the monogram area. You’re going to need to position those roughly where the monogram is supposed to fall. In the case of this wallet, it’s supposed to be on the interior lower, left-hand side. (See the instructions included with your Workfront ticket or ask for further instructions/clarifications.)
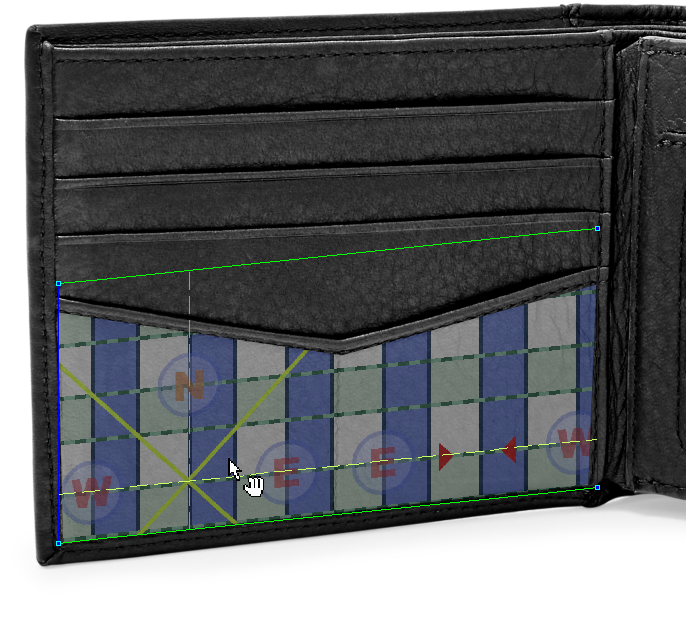
If everything looks good, it’s time to upload your work.
The preview texture was provided to us by Adobe and has small directional indicators that make this easier. If you don’t have it, everything you need should be available on my installation instructions.
Uploading to Scene7
Open the Adobe Dynamic Media Classic app.
Sign in using the credentials you were provided.
Be aware that in this step, you will be working in a live, production environment. Any changes you make may be seen on the live Fossil.com website.
Make sure you are in the FossilPartnersRender area. This will be shown in the dropdown at the top of the page as well as above the directory structure and again above the file list.
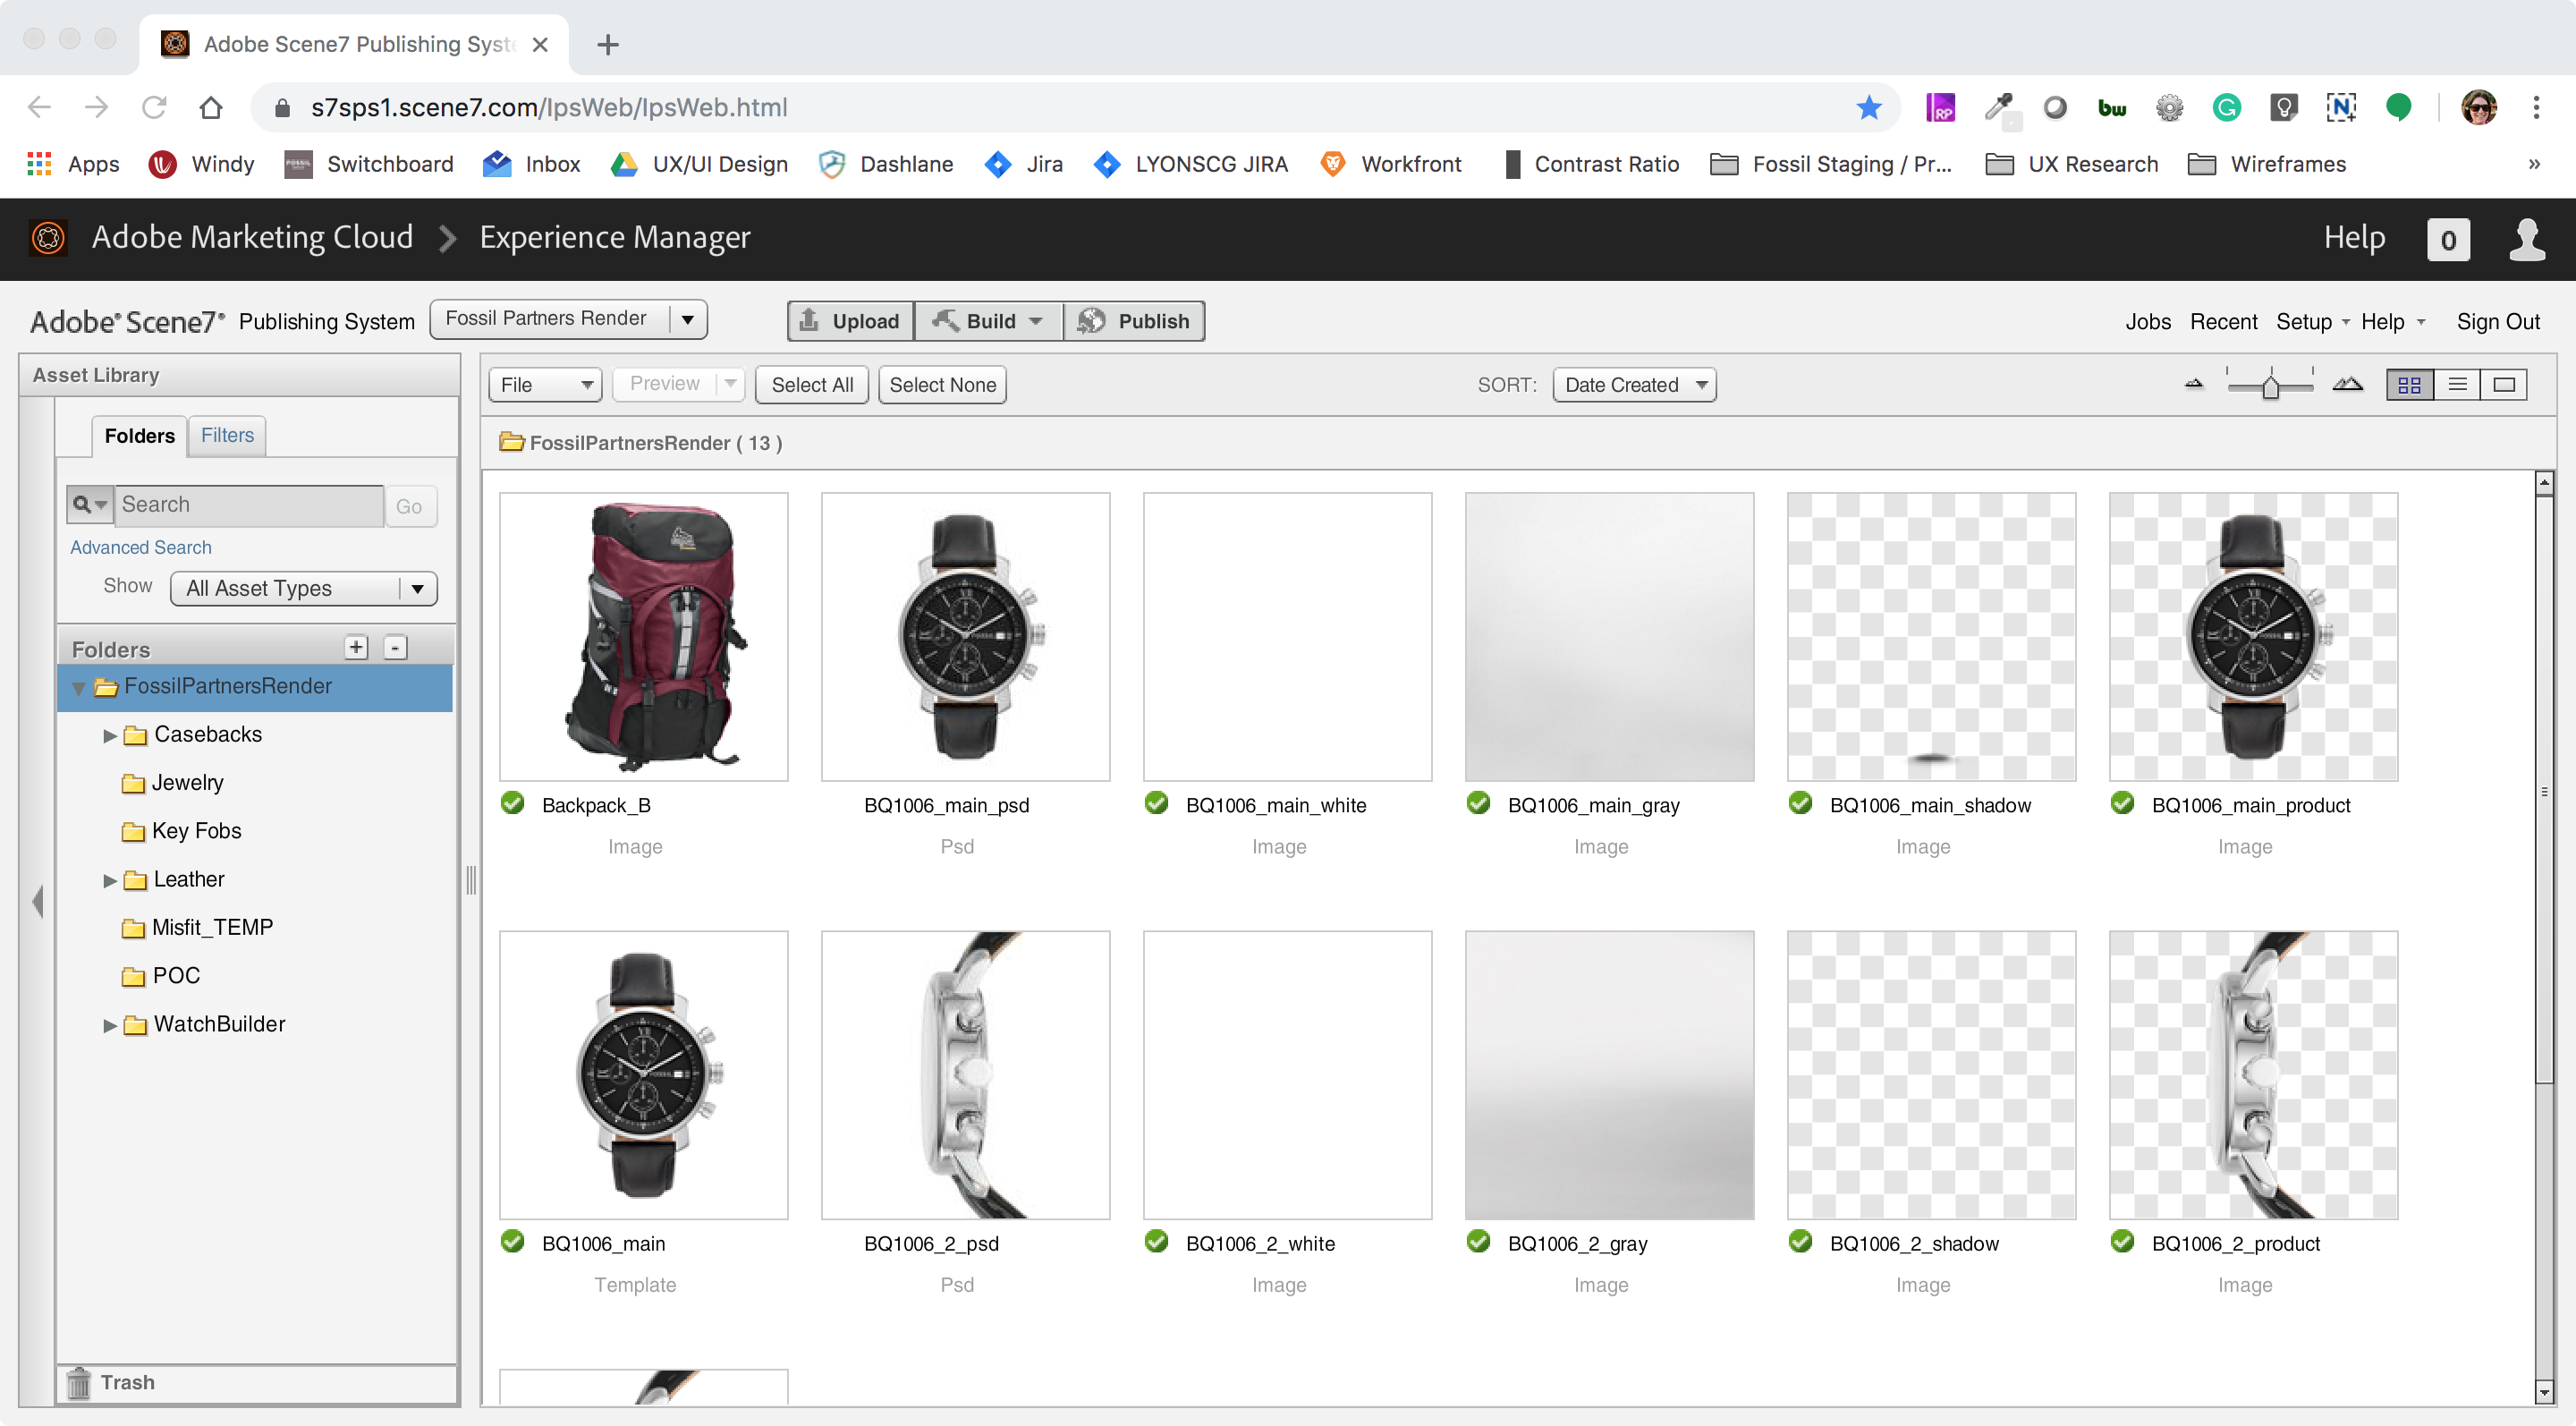
We’re attempting to maintain some form of organization. Please match the directory to what you’re uploading. For example, if you’re uploading images of bags or wallets, select Leathers. If you’re uploading images of jewelry, please upload them to jewelry. We’re also organizing them into season and year.
From there, click the upload button.

From there, you will be taken to the upload screen. This functions much like any other upload screen you may have used before.
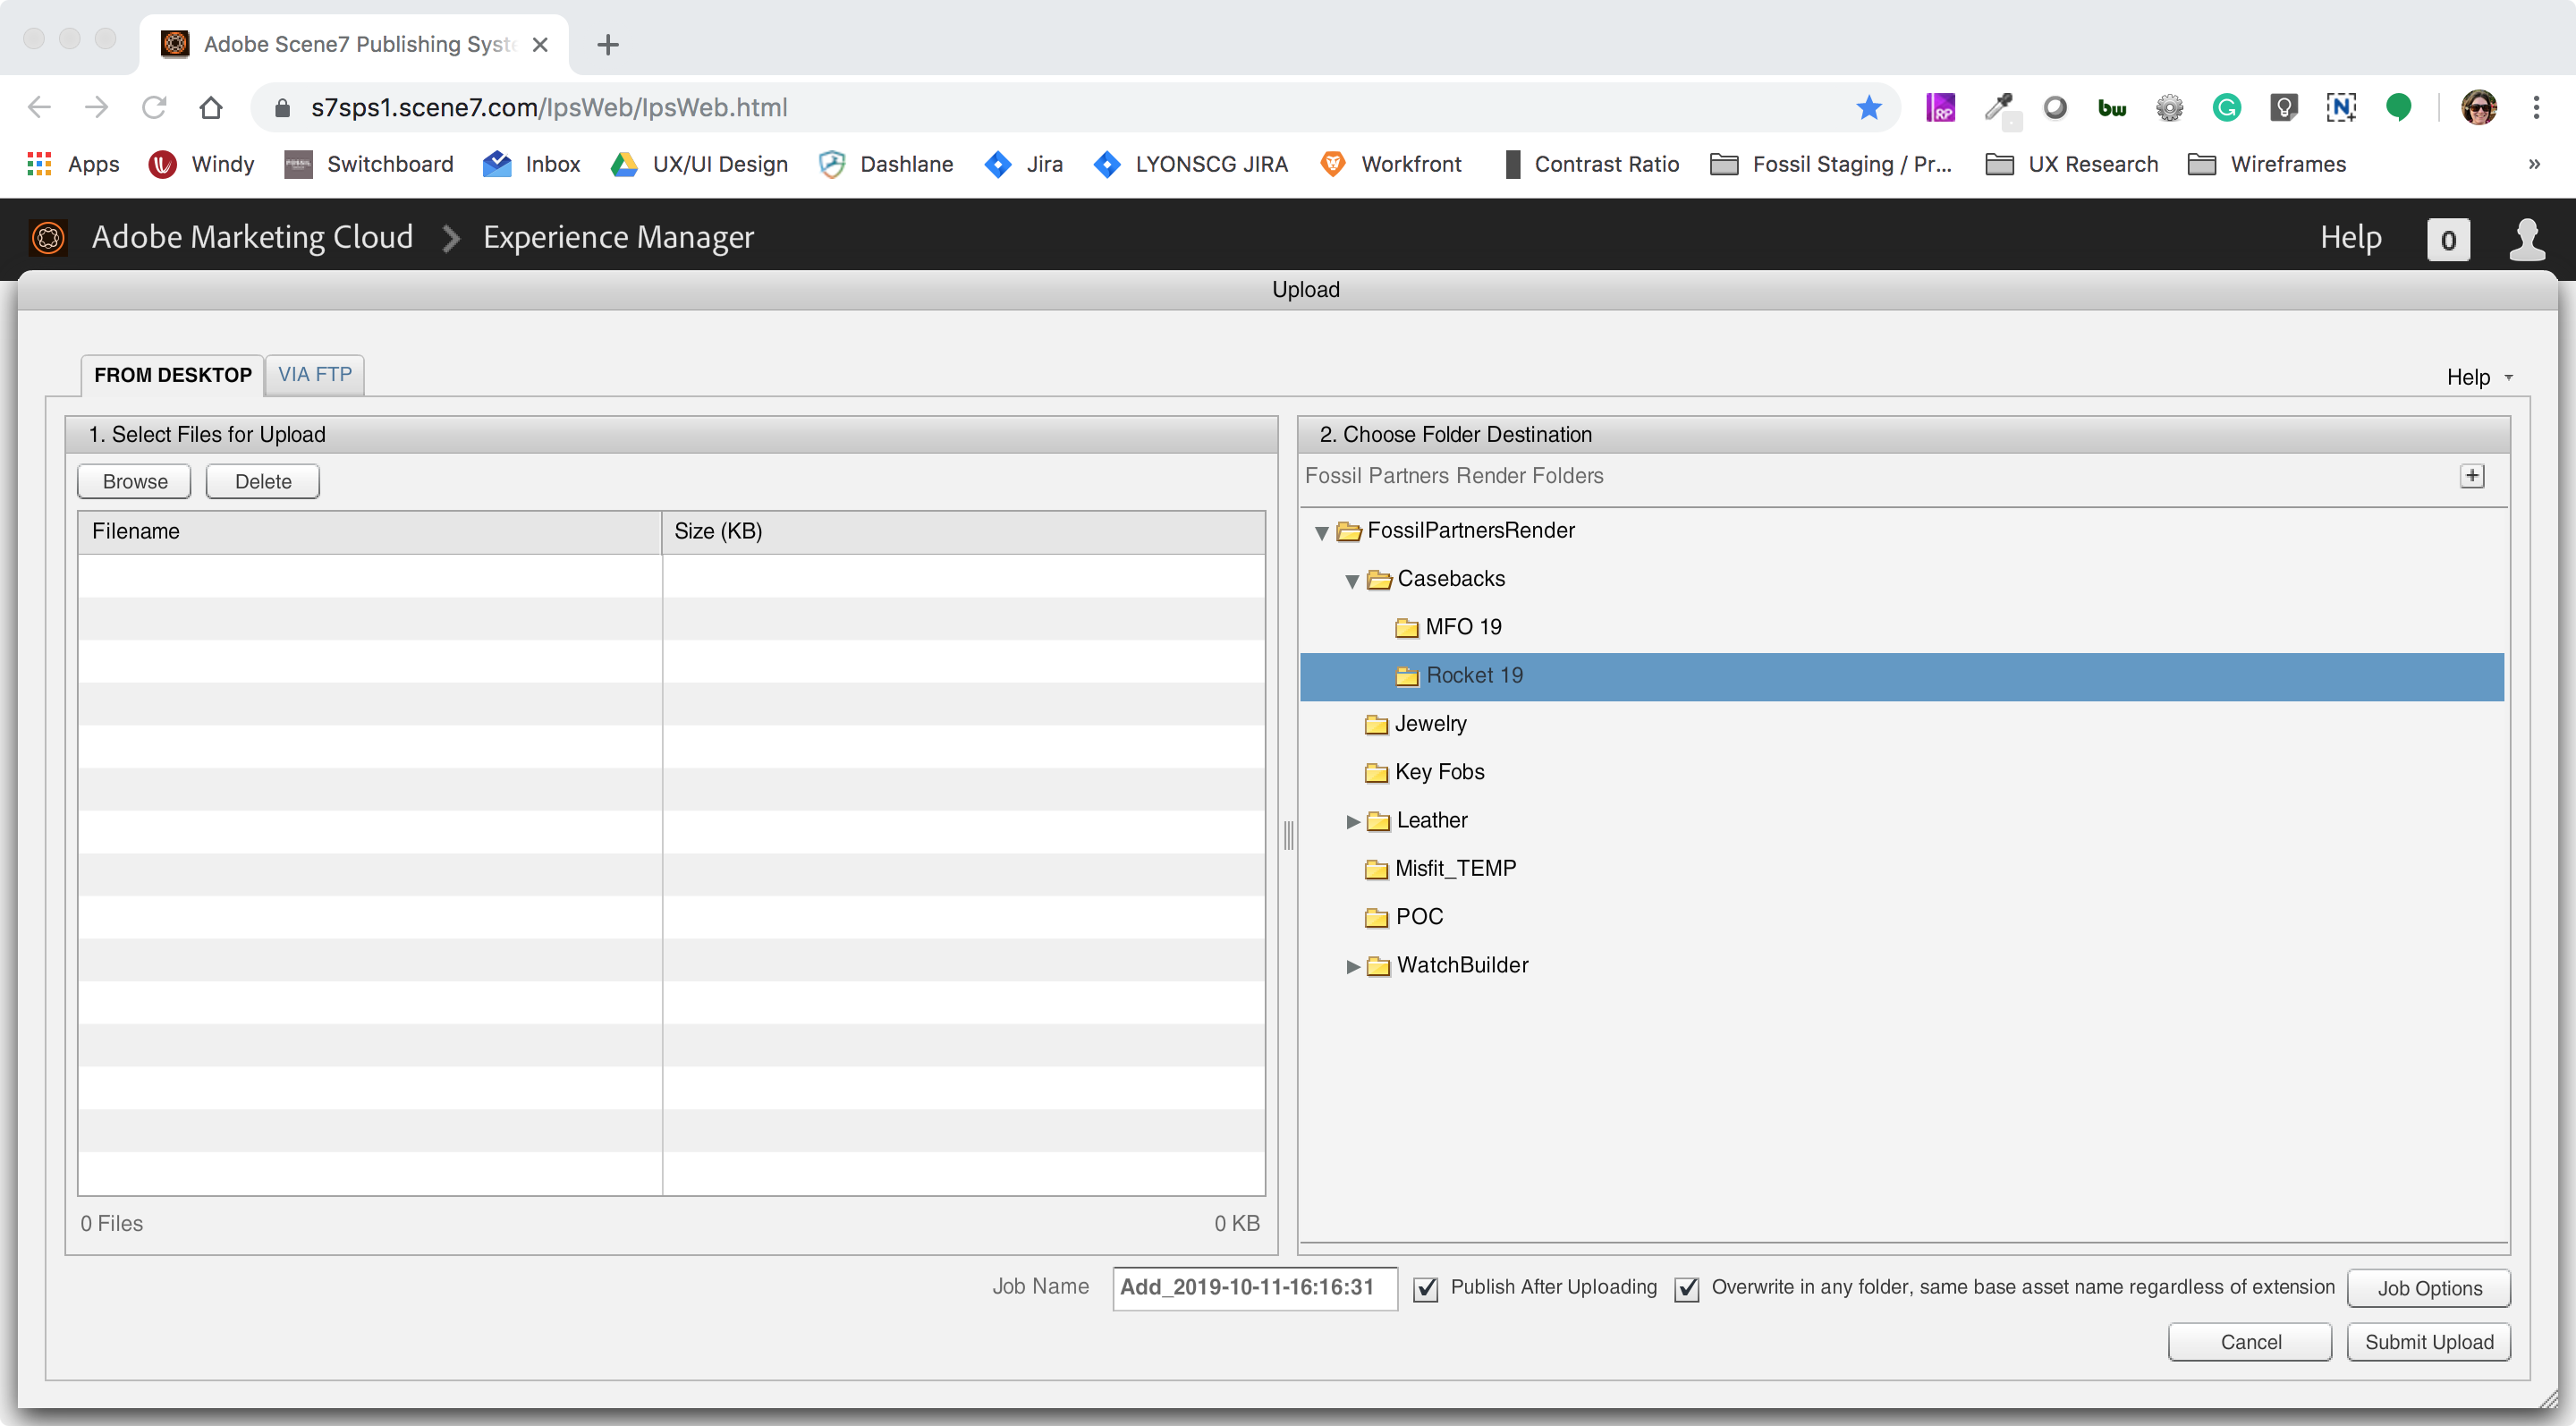
One thing to note is the checkbox labeled, “Overwrite in any folder, same base asset name regardless of extension.” This means that anything you upload may overwrite that particular file name if it already exists on the server. This is normally not a big deal, but it is something to keep in mind if any issues occur.
Under normal circumstances, you do not need to uncheck this or change any other settings. Upload and allow the file(s) to process.
You can continue working while Scene7 does this, though you may need to wait before uploading more files.
The page will automatically refresh once the upload and processing is complete.
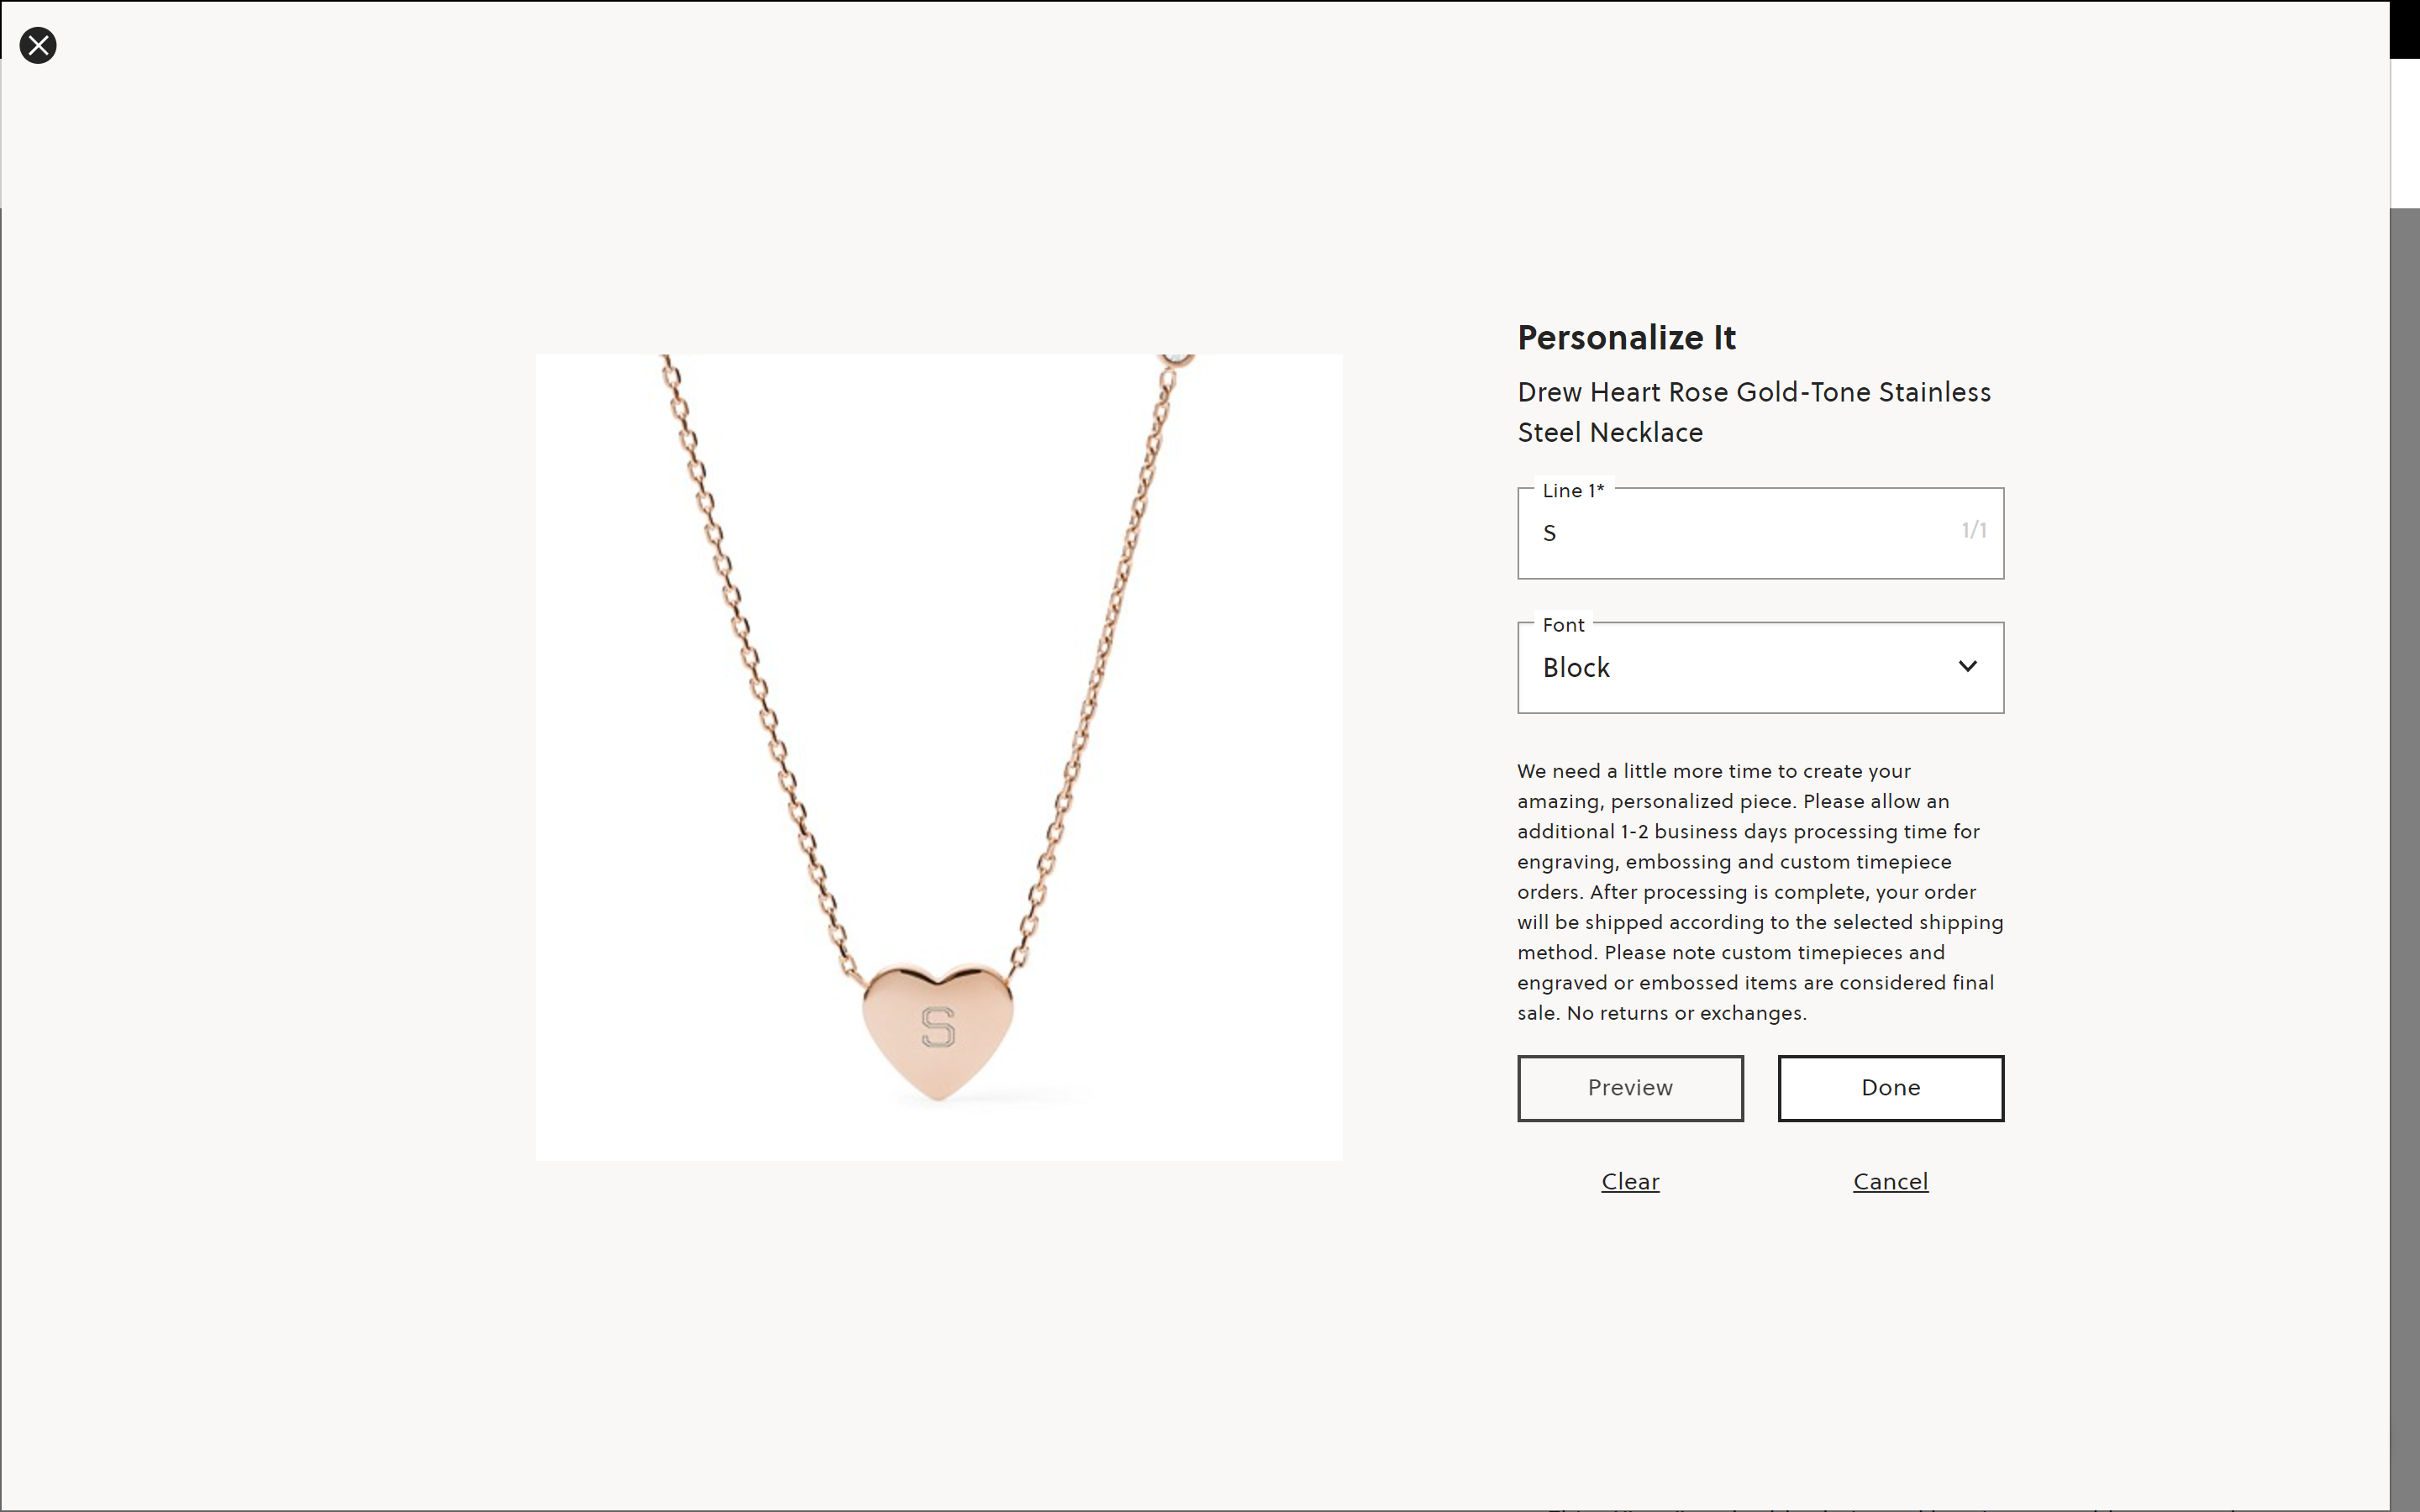
Testing
Now that you’ve uploaded, now is the time to test the monogram.
What You’re Testing
- Can you easily see the embossing? Is it too light or too dark?
- Is it appropriately sized? (Not too big, or too small)
- Is it positioned correctly per the instructions you were provided?
How To Conduct Testing
The simplest way to test your work is to locate a product on the live site that closely resembles the product you just worked on, going through the Emboss / Engrave steps. Once you have it on your screen, hit View Source and copy the URL of the preview image.
Then alter the URL to match the SKU you just worked on. Let’s break down the URLs:
Breaking down the Leather Embossing URL
| Base S7 URL | S7 Server | Product SKU | Photoshop Reference Layer | Emboss File Location | Emboss Type | Product Swatch SKU | Emboss Text | Monogram Options | Image Caching On/Off |
|---|---|---|---|---|---|---|---|---|---|
https://fossil.scene7.com/is/image/FossilPartners?src=ir{ | FossilPartnersRender/ | SL7958504-15 | ?obj=FLOW/MNGRM | &decal&src=is{FossilPartners/ | MONO_BLIND | ?$swatch=SL7958504_swatch | &$line1=FSL | &$font=Helvetica&$fs=500}&sharp=1&res=160}&$aemResponsive_pdp$&op_usm=1,0.4 | &$cache=off |
The important parts for us to test our work is the Product SKU, Emboss Type, and the Product Swatch SKU.
Product SKU
Change this to the SKU of the product you just worked on.
Emboss Type
To complete the Workfront ticket, you will need to test both a Blind Emboss and a Gold or Silver. To do this, Change MONO_BLIND to MONO_GOLD or MONO_SILVER.
Product Swatch SKU
Change this to the SKU of the product, but make sure to use _swatch rather than the -15.
Breaking down the Engraving URL
| Base S7 URL | S7 Server | Product SKU | Photoshop Reference Layer | Engrave File Location | Engrave Template | Engraving Lines & Text | Monogram Options | Image Caching On/Off |
|---|---|---|---|---|---|---|---|---|
https://fossil.scene7.com/is/image/FossilPartners?src=ir{ | FossilPartnersRender/ | GARRETT_01 | ?resmode=sharp2&obj=flow/mngrm | &decal&src=is{FossilPartners/ | STYLE_G | ?&$lines=3&$line1=Fossil&$line2=Fossil&$line3=Fossil | &$font=Block_W_LINE}&sharp=1&res=80}&$aemResponsive_pdp$&op_usm=1,0.4&wid=760&hei=760 | &$cache=off |
The important parts for us to test for engraving SKUs are Product SKU, Engrave Template, and Engraving Lines & Text.
Product SKU
Same as before, the name of the file you just worked on.
Engrave Template
You’ll find this on the tracking document linked on the Workfront ticket, usually represented by a letter. Change to match the style indicated.
Engraving Lines & Text
Different engraving products can take different amounts of text. Many watches can accept 3 lines of text, where Jewelry might only allow for a single letter. Again, check the tracking document and modify it as necessary.
Emboss & Engraving Example Links
If everything looks good, complete your Workfront ticket as you’ve been instructed. In my case, I’ll supply them with the test URL(s) for Merchant approval and let them know the work has been completed.
The merchants might ask for changes or adjustments. As you complete more of these, you’ll get a feel for what they’re looking for. When in doubt, ask questions!